
1. Turn Off the Printer Immediately:
Safety first! Always turn off and unplug the printer from the wall outlet before attempting to clear a paper jam. This protects you from electrical shock and prevents moving parts from causing further damage to the printer mechanism or tearing the paper.
2. Systematically Locate the Jammed Paper:
Paper can get stuck at various points along the paper path. Check these areas in order:
- Input Tray: Remove all loose paper from the input tray. Look inside the tray cavity for stuck sheets.
- Output Tray: Check where the printed pages exit the machine.
- Main Access Area: Open the main cartridge access door. Wait for the carriage to stop moving if you didn't unplug it.
- Rear Access Door / Duplexer: Most printers have a removable panel on the back. This is the most common place for severe jams.

3. Carefully Remove the Paper:
The way you remove the paper dictates whether you fix the printer or permanently break the gears.
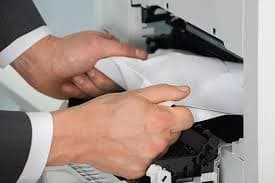
- Gently grasp the jammed paper with both hands to distribute the pulling force evenly.
- Pull the paper slowly and firmly in the direction it normally feeds through the printer (usually forward).
- Do NOT pull backward or yank forcefully. Yanking will strip the plastic gears inside the printer.
- If the paper tears, do not leave it. You must find all scraps.
4. Check for Remaining Scraps and Debris:
Even a tiny piece of torn paper the size of a coin can block the optical sensors and trigger another 'Paper Jam' error.
- Use a strong flashlight to inspect the rollers and gears carefully from the front and back of the printer.
- Use tweezers carefully to grab small scraps, being extremely cautious not to scratch the soft rubber rollers.
- Check for foreign objects like paper clips, staples, or sticky notes that may have fallen into the input tray.
5. Clean the Pick-up Rollers:
If paper jams are happening constantly without actual paper getting crumpled, the rubber rollers have lost their grip.
- Locate the rubber pick-up rollers (usually visible from the rear access door or input tray).
- Lightly dampen a lint-free cloth with distilled water (do not use alcohol or chemical cleaners).
- Wipe the rollers thoroughly, rotating them with your fingers to clean the entire circumference.
- Allow the rollers to dry completely for 10 minutes before plugging the printer back in.
6. How to Prevent Future Jams:
Proper paper handling is the best defense against paper jams.
- Do not overfill the paper tray. Never fill above the maximum fill line marked on the tray.
- Fan the stack of paper before loading it. This introduces air between the sheets and prevents static cling.
- Adjust the paper width guides so they rest snugly against the edges of the paper without bending it. Loose guides cause skewed feeding.
- Use high-quality paper supported by your printer model. Store paper in a cool, dry place to prevent moisture absorption, which makes paper curl and jam.
Summary
Following these detailed steps ensures you remove the jam safely without damaging sensitive internal printer components. If paper jams occur frequently despite cleaning the rollers and using good paper, the printer's internal feed mechanism or sensor array may be permanently damaged and require professional replacement.